|
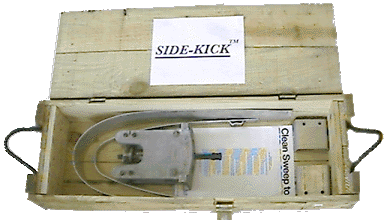
SIDE-KICK™ USERS
ARE NOW EARNING
LARGE DOLLARS...
all year round by
realizing this opportunity to
increase their business in
what normally would
be the slow season.
CHIMNEY FIRES ARE
VERY DANGEROUS...
and life threatening,
when damaged liners are involved.
Many of these liners are
damaged in the tens of
thousands of chimney fires
each year.
SIDE-KICK™
" THE PRESCRIPTION
FOR THE FLUE"
Damaged liners are simply
replaced leaving the stove
or insert unchanged. When
expensive alternatives
are used as in the case of
sleeves the effective area
of the flue is reduced thus
restricting the stove size.
Many times the stove must be
replaced with a
smaller unit.
Note:
As with chimney liner work, care must be taken that the chimney
itself has not been dangerously weakened before relining is
undertaken.
|
STEP BY STEP ON THE JOB OPERATIONS
- Locate damaged liners
(a good flashlight on an extension rod works well)
- Take the normal
precautions to prevent soot from leaking out into the house
and remove the chimney cap.
- Insert a Splay Board
from below or above as a safety. Should a liner crumble on its
removal, the Splay Board will protect the flue liners below
from damage.
- Gently free the first
liner by hand and remove it. Repeat with the second and
perhaps the third.
- Relocate the Splay
Board below the next few liners.
- Fit SIDE-KICK™
to a second rod assembly and lower it into the next liner to
be removed. Lock the dogs and lift it clear.
- Lower the Splay Board
with any debris to the bottom of the chimney, then relocate it
below the top two liners. Repeat until all the damaged liners
are removed.
- To mud the existing
top liner: first chip off the old mortar. A blunt end on a
steel chimney brush works well.
- Lower the the Splay
Board level with the top of the tile just cleaned in the flue,
then hold it in place while dropping a few trowels of mud down
the chimney. Gravity and inertia will mortar the liner for
you.
- Raise the Splay Board
to the top of the chimney. Remove it from the rod and replace
it with a hard brush to fit the new liners.
- Perforator the top of
the new liner and lower it to rest on the existing liner.
Remove your SIDE-KICK™
tool.
Run the hard brush down
through the top two liners to sweep the mortar smooth and to
fine tune the liner alignment with each other. Repeat until
all the liners that you can't reach by hand are in place.
AND
THAT'S IT!...THAT'S IT!!
|
|